Saturday, May 5, 2012

For some time now, I have been drawing and writing in my journal to learn, grow, and express my walk with God.  I have always known that I enjoyed creating, but didn't understand how God, the Creator, gave me the desire and joy I find in it.  I do now.  I started reading a book called Sacred Pathways and it's helped me understand a lot. 
So, from time to time I am going to take a big step and post some of my journal entries.  Some of them are from Bible study notes, sermon notes, some from scripture or worship songs that speak to me, and some from personal "ah ha" moments I've had alone with God.  I am so blessed.

This is one from III John 1:4.

Saturday, March 24, 2012

Easter Veggies

A year ago St. Patrick's Day weekend we put some tomato plants in our earth boxes.  We had a decent crop spread out over midsummer to late autumn.  The vines began to shrivel by the beginning of December and we left them to die off.  We never got around to digging out the old plants and preparing the soil for new plants, so missed the tomato sale this year.  I thought today since I was working in the yard I would at least cut back all the old vines, and to my surprise, the spring rabbit left us tomatoes instead of eggs!   I'm thinking a chopped tomato, fresh mozzarella and basil salad tomorrow.  Yum!

Monday, September 26, 2011

Sweet Bundle of Joy

If you know me at all, you know that spending time with my grandchildren is high on my list, so this summer having them all together for a week was incredible.  One of my granddaughters turns three today and I can't let the day pass without sharing a little about her.  She is so much fun! 

Here are just 10 things I love about her:
1)  She is girly--loves "pretties" and her "tinkerbell" (her ruffly skirt). 
2)  She's a tomboy--plays anything rough the boys want to do.
3)  She can be in charge--heard coming out of her mouth "knockee off boys!"  Her mama has nicknamed her the "Little Colonel".
4)  She can play bashful or shy--bats her pretty eyes at Papa. 
5)  She tries to keep up with her big brothers--has been known to follow them out in the snow with boots and a diaper and that's all!
6)  She likes to love on and play with her baby brother. 
7) Snow and dirt do not seem to phase her at all. 
8)  She can be very self-sufficient--if she's hungry, she can find something to eat herself, even if it means she has to climb to get it. 
9) She likes to talk--will say anything on the phone just to keep the conversation going!
10)  She can roll with the punches--when we went to Disneyland, she was cheerful from 10 in the morning until after 10 at night without a meltdown.


She melts my heart!
I wish I could hug and squeeze her today, but a phone call will have to do.  Love her so very much!!

A Heart for Kids

For the last several years I have been involved in "All the Arts for All the Kids"; a foundation set up to provide classes in the arts to the public school children in the city of Fullerton.  Last year, the Artbreakers (a mosaic group to which I belong) was challenged to mosaic a 5 foot tall heart to be auctioned for the cause.  It was a tremendous amount of work but well worth it---over 350 total hours but the heart sold for $5,000.  You can read about it in an earlier post called "10 of Hearts".

This year we were challenged again---6 of us worked on the heart in Nancy's garage.  The theme was to be as if we were making overlapping "prayer rugs", but some who view it think it looks more like quilts than rugs.  To make it easier to work on, each person drew off a section and applied their mosaic rug design to mesh.  Then, the mesh piece was applied with thinset, and finished off with grout.

Hopefully we will get a generous buyer who will see the value of the donation, the beauty of the work, and the hearts behind the heart.

I enjoy looking at each rug on the heart and thinking about each friend who lovingly made it.  Thanks Gail, Julie, Kirsten, Nancy and Shelley for letting me work on this with you.  I love you all.

Sunday, September 18, 2011

Making Watercolor Journals


I took an online class from Julie Prichard a couple of years ago in making handmade journals.  It's definitely worth the time and money as Julie is an excellent teacher.  These are some of the journals I made (I can never make just one of something! ha!)  The paper used is Fabriano, but here's the very best trick of all.....she says to use the stationary because it's the perfect size to fold and perfectly pre-cut!  Brilliant!  So, I took it one step further and bought the Fabriano watercolor notecards that are pre-creased!

Then, I took her class on different art techniques to use in your journal.  Really fun!!

And last but not least, I took a one-day drawing class from Katherine England in drawing for journaling.  AWESOME DAY.  If you EVER have a chance to take a class from Katherine, it is SO worth it!  I had convinced myself that i couldn't draw but here is a page I completed the next day after taking the class---not too bad---at least the objects are recognizable!  ha!

Monday, September 5, 2011

Recycled Box


I am involved in an online art group that is currently going through a great book called Raw Art Journaling - Making Meaning, Making Art by Quinn McDonald.  One of the suggested assignments is to make a box for 'found words' that can be used as journaling prompts.  Several have suggested making an origami box, but I have made a simpler box with my students that is made out of recycled greeting cards.  Others who see the finished product often ask how the box is made, so I decided to post a mini-tutorial with pictures.  Can you tell that I'm a visual learner?   :-)

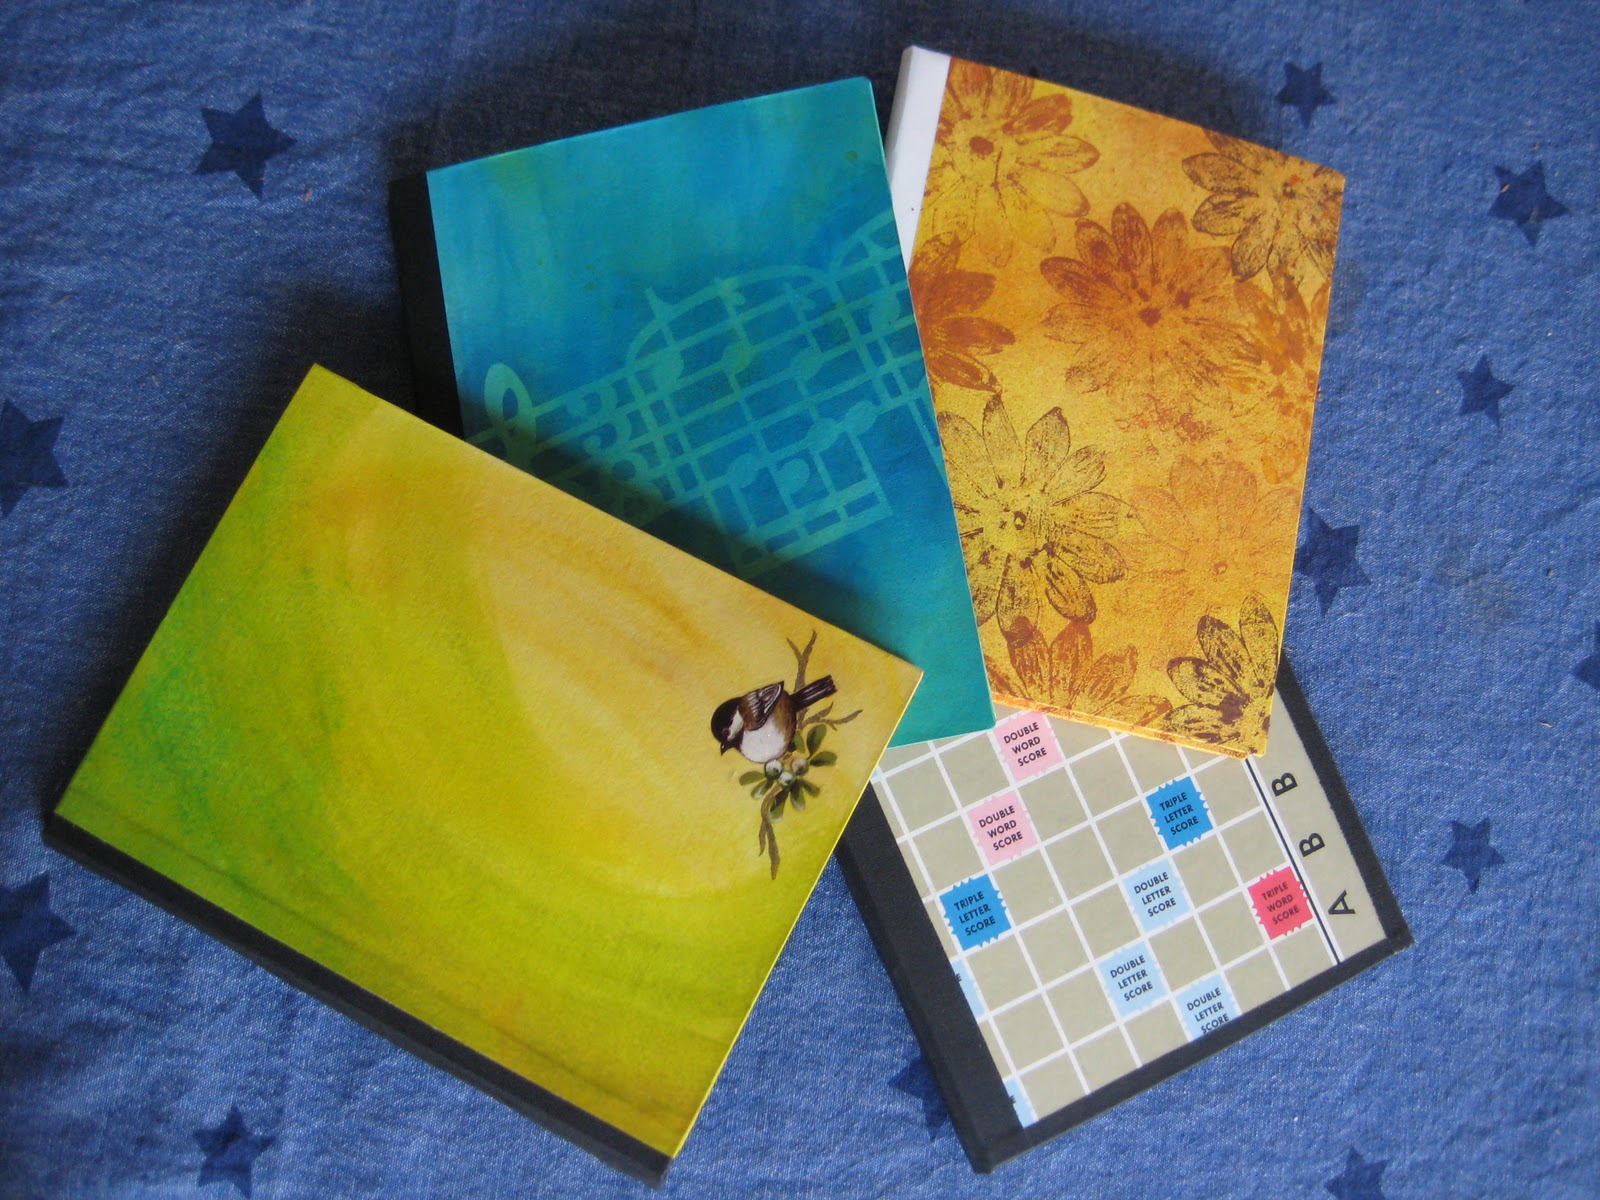
To make a box, you will need a ruler, pencil, scissors, tape, and nice rectangle greeting card with the focal point of the picture, somewhat centered.

Separate the card along the fold, and then trim the back of the card by 1/8th to 1/4 inch along one side and along the top or bottom.  Do not trim the front.


Then, line your ruler on the back side of each piece from point to point and draw a short line in the middle. Repeat from opposite points and then draw a dot where lines intersect.


Fold edges into the center dot to meet- open back up and repeat from opposite direction.


Turn card lengthwise and cut on the fold lines to the first fold line.  Repeat on other end.

Fold in side flaps and fold over end flap and tape.


If you trimmed the back of the card enough, the top of the card should fit nicely over the bottom to complete your box.
You will quickly learn what cards work and which ones do not.  The cards need to be rectangle, not square, no overlays, etc. but it is really fun to experiment.  Have fun and feel free to ask questions!


Thursday, July 28, 2011

Letterista Class

One of my summer "want to do" items was to take a couple of art classes (that were within my limited budget) to keep up-to-date for my art students.  I found a 3-hour class at Art Supply Warehouse in Westminster with Lisa Englebrecht called "Letterista".  I  recognized Lisa's name from Artfest from a couple of years ago, so I knew she would be a quality instructor. Lisa uses calligraphy and all kinds of art designs to produce lettering that can be used for many different art projects including art journaling.  I really appreciate the freedom that she demonstrates and then in turn, gives to her students to let go of the firm boundaries of calligraphy, to create and stretch using all sorts of pens, paints, pencils, etc.  The best tool that I learned about at the class was a pen called Pilot Parallel Pen----cartridges can be added in various ink colors---really cool and usable for anyone, not just those who can do "real" calligraphy. 

I totally enjoyed the experience and hope to take a beginning watercolor class from Lisa very soon.  Below are some of the gorgeous work that others in the class produced and one of my attempts.


Mosaic Birthday Chair

I finally finished my "birthday chair", the chair for all the grandkids to sit in at Grammy's house when it is their birthday.  Mosaicing a chair was an assignment in my mosaic class with Katherine (http://www.katherineengland.com/ ), but I struggled and struggled with what chair to use, what design, what I wanted as an end result...  Finally, I decided I wanted to pattern it after the work of Mary Englebrecht because I knew the grandkiddlettes would respond to something colorful and whimsical.

Yesterday I finally grouted, and I have to say, I love it! After 5 1/2 years of doing mosaics, I realize I have about 5 items I've really loved, and this is one of them. Hope you enjoy it, too!


Wednesday, July 6, 2011

Organizing Mosaic Supplies

One of my first projects for the summer was to organize my mosaic supplies so that I could dig in and get to work.  Some of the projects I will be working on are:  1) another "heart" for "All the Arts for All the Kids" (see earlier posts) with 6 of my good friends, 2) a mosaic portrait of my grandson Ethan, 3) some projects for  the "Green Scene" next spring, 4) treasure boxes for Clayton, Maxx, Sadie and Ezera, and last but not least, 5) several friends and family members want to try their hand at mosaics this summer so I'll be having a mini-class/mosaic party on a summer Saturday.
I organized small cut pieces of glass by color in plastic containers, specialty items in cigar boxes, large sheets of glass in wood IKEA magazine boxes, etc.  One shelf is for tools and adhesives, another for grout, thinset, cut glass strips and large containers of tile and cut china/pottery pieces.

Now to tackle the house, shelf by shelf, closet by closet!  Ha!

Sunday, May 1, 2011

Ribbon Bound Journal

I took an online journal making class quite awhile back, and one of the journals we made was pages bound together with PVA glue and  ribbon or strips of fabric. I've seen this same method done in some journal making books and blogs so I thought I'd post some pictures to show how my pages looked. They aren't difficult--I actually think children could make them without too much craziness.


Below is a view of the binding of the pages before a cover is attached.  If you look closely, you can see the ribbon folded and glued between the pages.
 
Below is a finished book with cover and a cloth strip for a spine.  The spine was made by using paper towels that were dyed using liquid watercolors.  After air drying, the paper towels were separated to single ply, torn into pieces, and glue to a muslin strip with PVA glue and left to dry.
Hope you enjoyed this---let me know if you have any questions!
Lynda